Multi-stage Approval
Introduction and context
CloudBilling has introduced a functionality that facilitates multi-stage invoice approval. With this functionality, CloudBilling offers the ability to expand your invoice approval process to include multiple steps of invoice approval. This documentation describes the default approval process and how to configure new approval processes to fit your organizations’ invoice approval processes.
Approving invoices
With the introduction of this functionality, the default approval process is expanded by one step. The new step of requesting for approval is added to the existing process, which is configured for the ‘All Customers’ customer cluster. This step ensures that the contents of the invoices will not change between the moment of checking the invoices and the moment of actually approving the invoices. This also allows different stages in the approval process to be carried out by different people, if this is required by your organization.
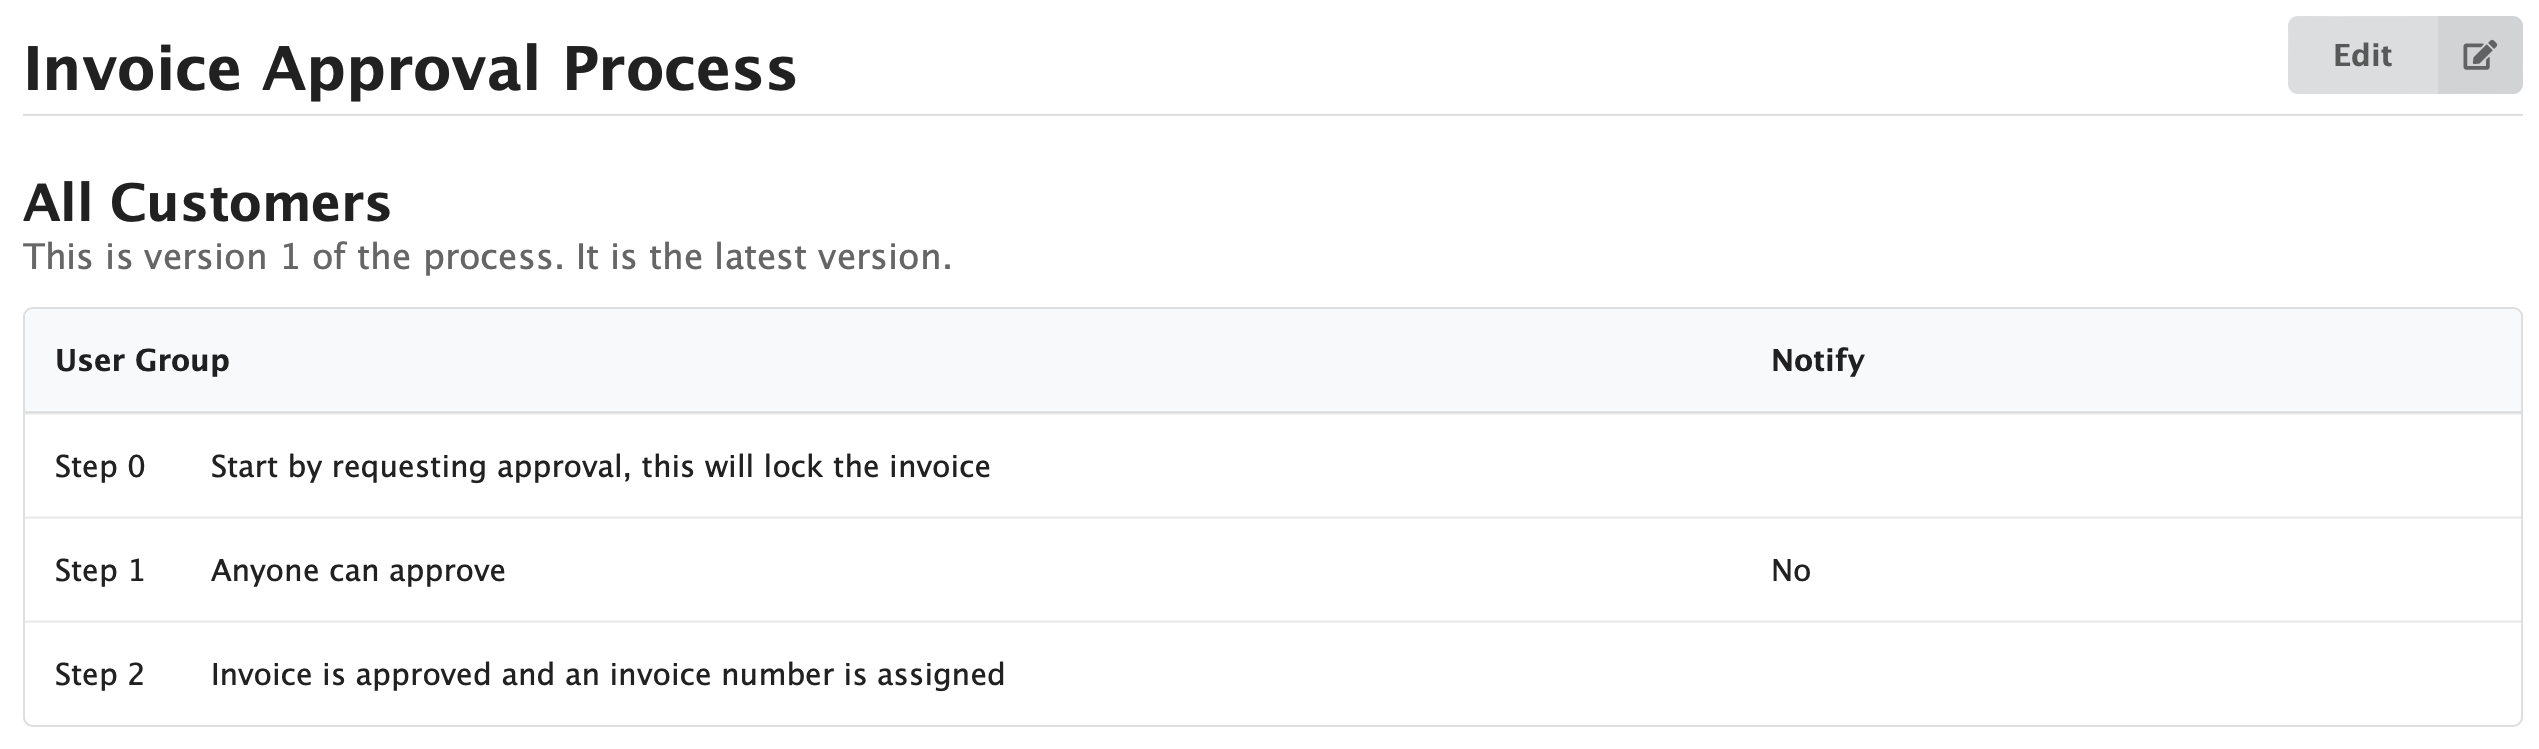
The default approval process consists of the following steps:
- Requesting approval for an invoice or a selection of invoices. Executing this step will lock the invoice(s).
- The invoice is ready for approval. In the default process, every CloudBilling user that has the Approve right in Invoicing is able to approve the invoice.
- The invoice is approved and an invoice number is assigned.
1. Starting the approval process: request approval
Go to the Invoices screen in CloudBilling by clicking on the ‘Invoices’ button on the top of your screen. You may use the filters to find the invoices that need to be approved (e.g. by clicking the ‘Ready To Approve button’). Open and check the invoices to be approved. After checking the invoices, click on the exclamation mark in the row of the invoice that needs to be approved or the exclamation mark on the top if you made a selection of invoices to be approved. By clicking the button with the exclamation mark, you will get a pop-up that shows you what your options are and how many invoices will be impacted by the option. Clicking ‘Request Approval’ locks the invoice(s) and begins the invoice approval process.
Please note: you can only click the options in the approval process that you are authorized for. The buttons of other options will appear greyed out.
2. Approving or rejecting invoices
After requesting approval for an invoice, it is ready to be approved or rejected. The Status column in the invoices screen shows which invoices are in the process of approving, but you can also use the filter of ‘Pending My Approval’ to find all invoices that wait for your approval. Select the invoices you want to approve or reject and click on the exclamation mark button. This results in the pop-up that shows you the approval options and the number of invoices that will be affected selecting an option
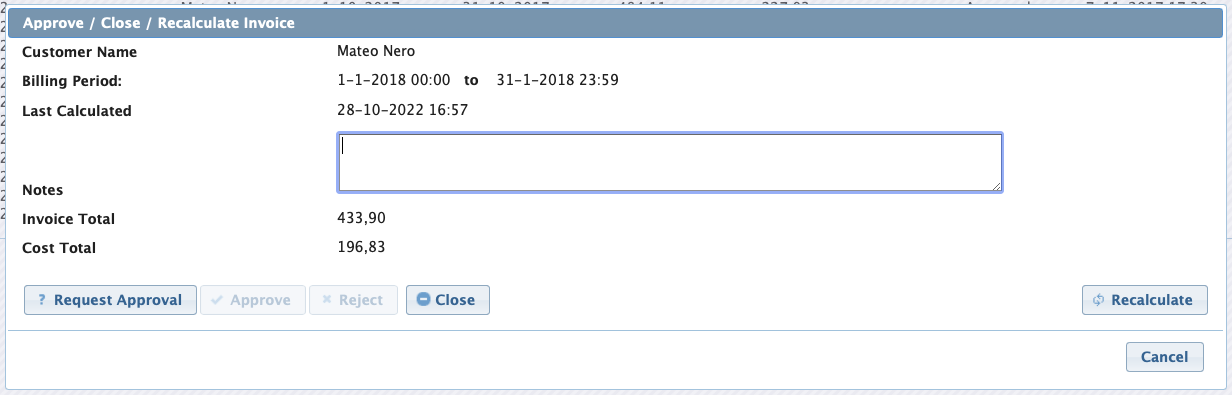
By approving the invoice, the invoice will be definitively approved as this is the last step in the approval process. If you reject the invoice, it will be send back to the prior step in the process and approval has to be requested again.
Setting up a new invoice approval process
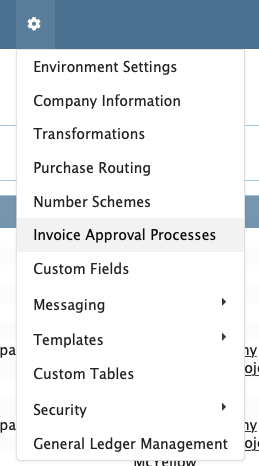
If this approval process needs to be expanded for your organization, this can be done via the ‘Invoice Approval Processes’ button in the Administration menu. Click this button to see which processes are present and to add a new process. The ‘Invoice Approval Processes’ screen shows the present processes, based on the customer cluster for which they are configured. The default approval process is configured for the ‘All Customers’ customer cluster and more specific clusters take precedent. This means that you can add a new approval process for (e.g.) a country or region based customer cluster, which overrules the default approval process that is configured for All Customers. Consider to change the default approval process if you want the changes to be applied for all of your customers.
Adding a new Invoice Approval Process
You can add a new approval process by clicking the ‘Add Process’ button on the top right corner of your screen. This will open the ‘Create Invoice Approval Process’ screen, which allows you to set a Customer Cluster for this process. Below the selected customer cluster, the default steps of the approval process are present. Step 0 (requesting approval) and step 1 (approving the invoice) form the basis of your new process. You can add a new step to the process by clicking the ‘+ Add Step’ button. This will add a step to the process, for which you will need to set a specific user group. Make sure to select a suitable user group for the step you’re adding to the new processs: the user that needs to execute this approval needs to be in this user group. See the CloudBilling docs on Security) to read about the user groups.
User Groups As described in the above, the user groups that you have in CloudBilling can be used to specificy certain steps in the approval process. This requires the user groups to be up-to-date, or you may consider to add new user groups to facilitate the approval process that is required by your organization.
Notification For each new step in the approval process, the option of notification (by email) will be automatically activated. When this option is activated, an email will be sent to the users who are in the user group that is set in this step of the process. The users will get an email notification which states that their approval is requested for a number of invoices. The emailadresses of the CloudBilling users are used for this email notification.
Changing a process After selecting a process, you can change the process by deleting or adding steps, or changing the order of steps via the buttons on the right side of your screen. If a certain approval process is redundant, it can be deleted. Make sure to double check this with your billing officer before deleting an invoice approval process.