Add / Edit a Purchase
The Add / Edit a Purchase screen can be divided into two parts, Purchase information and Metadata.
Purchase information
A number of fields are required to be completed when adding a new purchase or editing an existing purchase.
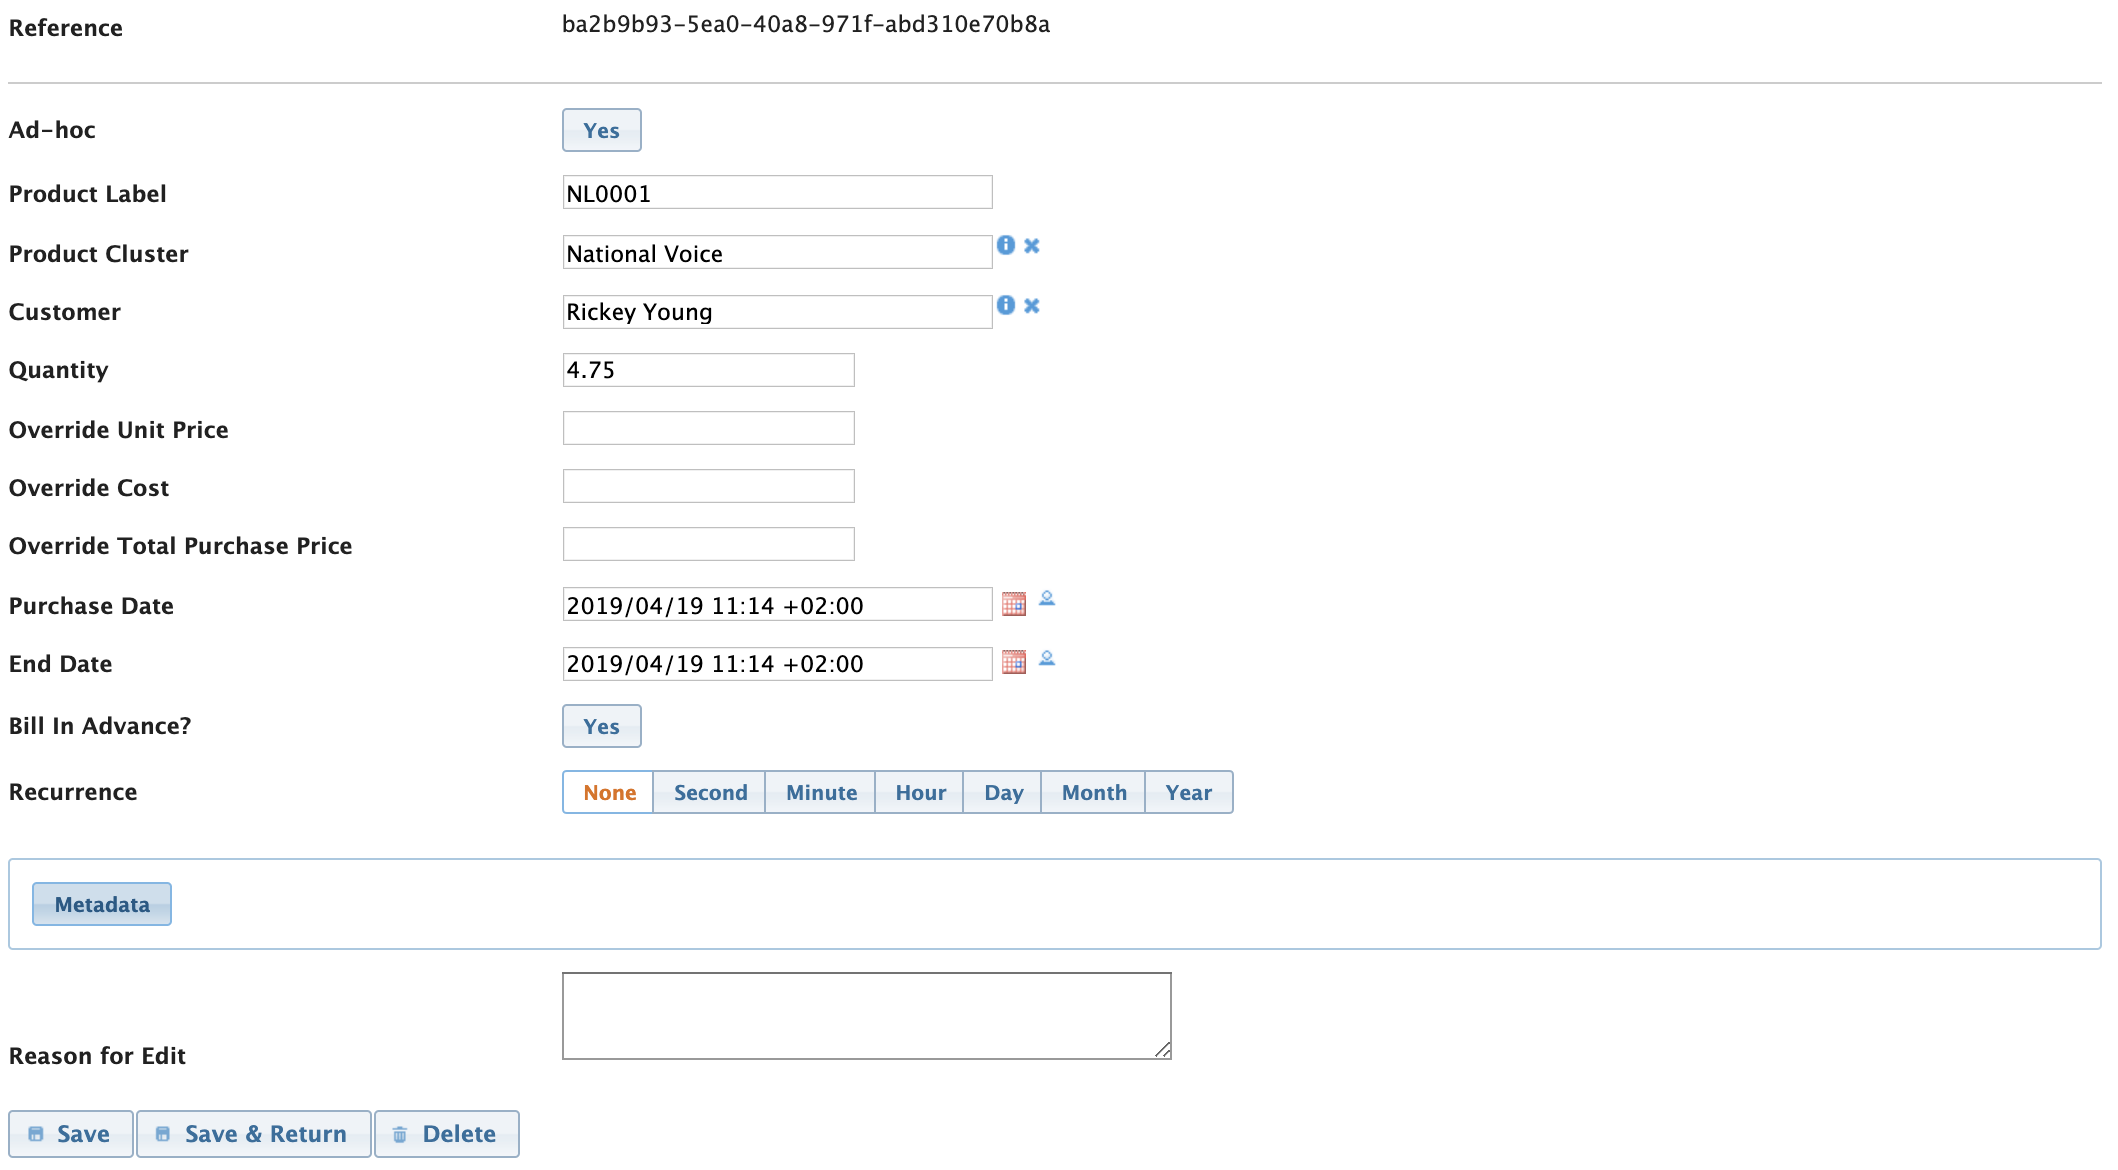
- Reference - A purchase must have a unique reference that is used to identify the purchase.
- Ad-hoc - Designate a purchase for an Ad-hoc invoice by clicking Yes.
- Invoice Reference - When you click the Yes button for Ad-hoc, this field appears. Enter and select the Invoice Reference of the invoice that this purchase must be allocated to.
- Product Cluster - The product cluster is used to categorise the purchase.
- Product Label (Optional) - The product label is not required when adding the purchase via the UI. The product label is used to determine the product cluster when the purchase has been sent to CloudBilling via the API. More information on sending purchases into CloudBilling via the API can be found in the API Guide.
- Customer - Here you must fill in the Customer Name so that CloudBilling can link the purchase to the correct customer.
- Quantity - The Quantity of the purchase.
- Override unit price (Optional) - When a specific purchase has a unit price that differs from the pricing plan you can fill in the correct price here. The value of the price rule will then be overwritten by this value, taking into account the Quantity.
- Override cost (Optional) - When a specific purchase has a unit cost value that differs from the cost defined in the pricing plan, you can fill in the correct value here. The cost value of the price rule will be overwritten with this value, taking into account the Quantity.
- Override Total purchase price (Optional) - The total calculated value of this purchase will be overwritten by the value specified here - this option specifically ignores the Quantity..
- Purchase date - The date the purchase was made. This is used to determine which invoice the purchase should first appear on, etc.
- End date (Optional) - If the purchase is valid for a specific period. Used for recurring purchases or purchases for products that have a unit price. If a recurring purchase does not have an EndDate, it is regarded as “open-ended”.
- Recurrence (Optional) - If the purchase is recurring, you can choose the following recurrence periods
- None (default) - this means that the purchase is not recurring.
- Second
- Minute
- Hour
- Day
- Month
- Year
- Recurrence period size - When you choose a recurrence period other than None, this field appears. The period size describes the length of time in respect of the recurrence type chosen.
- Example: If you have chosen Month, and fill in “1” here, this will mean the purchase will “recur” every month as long as the purchase is valid (i.e. up till it’s EndDate). Put another way, once can think of this this combination of values as a way of indicating how many times this purchase will “be charged”, or, appear on invoices.
- Reason - When desired it is possible to add a reason explaining why the purchase was added or edited.
When you have completed all the Purchase specific details, press the  button at the bottom of the screen.
Note: Adding or updating a purchase might affect the calculation of current invoices. For this reason, CloudBilling will automatically determine which invoices need to be recalculated or updated, and queue them for recalculation.
Metadata
In some situations, it is important to be able to include extra information needed for billing calculations (via PriceRule Expressions and Conditions), or to be included on the invoices. To cater for this, CloudBilling allows for the addition of extra information to a purchase, in the form of metadata. This metadata can be anything, as long as it can be represented as a String (text), a Number, or a Date.
Viewing a Purchase’s Metadata
On the Add / Edit Purchase screen, all metadata is shown (toggle the  button to display/hide). To add a new metadata item, click the
  button.

Creating Metadata
After clicking the button, you will be prompted to enter the new values as follows:

- Type - choose between
- String - textual values
- Numeric - any number value
- Date - date (and optionally time)
- Name - a unique identifier for this information.
- Value
Once you are satisfied with your input, clicking the button will assign the new metadata to the Purchase.
When you have completed all the Purchase specific details, press the  button at the bottom of the screen.
Note: Adding or updating a purchase might affect the calculation of current invoices. For this reason, CloudBilling will automatically determine which invoices need to be recalculated or updated, and queue them for recalculation.