Manage Your Account
In the menu under your username in the top right-hand corner of the screen, you can find your user profile. On this screen you can change information associated with your account, reset your password, and set up login verification.
At the top of the screen you can change the name associated with your account.
Settings
In the settings you can change your user’s timezone as well as locale. These settings are used to determine how to display and format dates and numbers.
Password
The password section allows you to set a new password for your account. Should you ever forget your password, it can also be reset by clicking the “Forgot your password” link on the login screen.
Login Verification
In this section you can setup login verification, also known as 2 factor authentication (2FA) or multi factor authentication (MFA).
If you do not have login verification configured, this section will look as follows: 
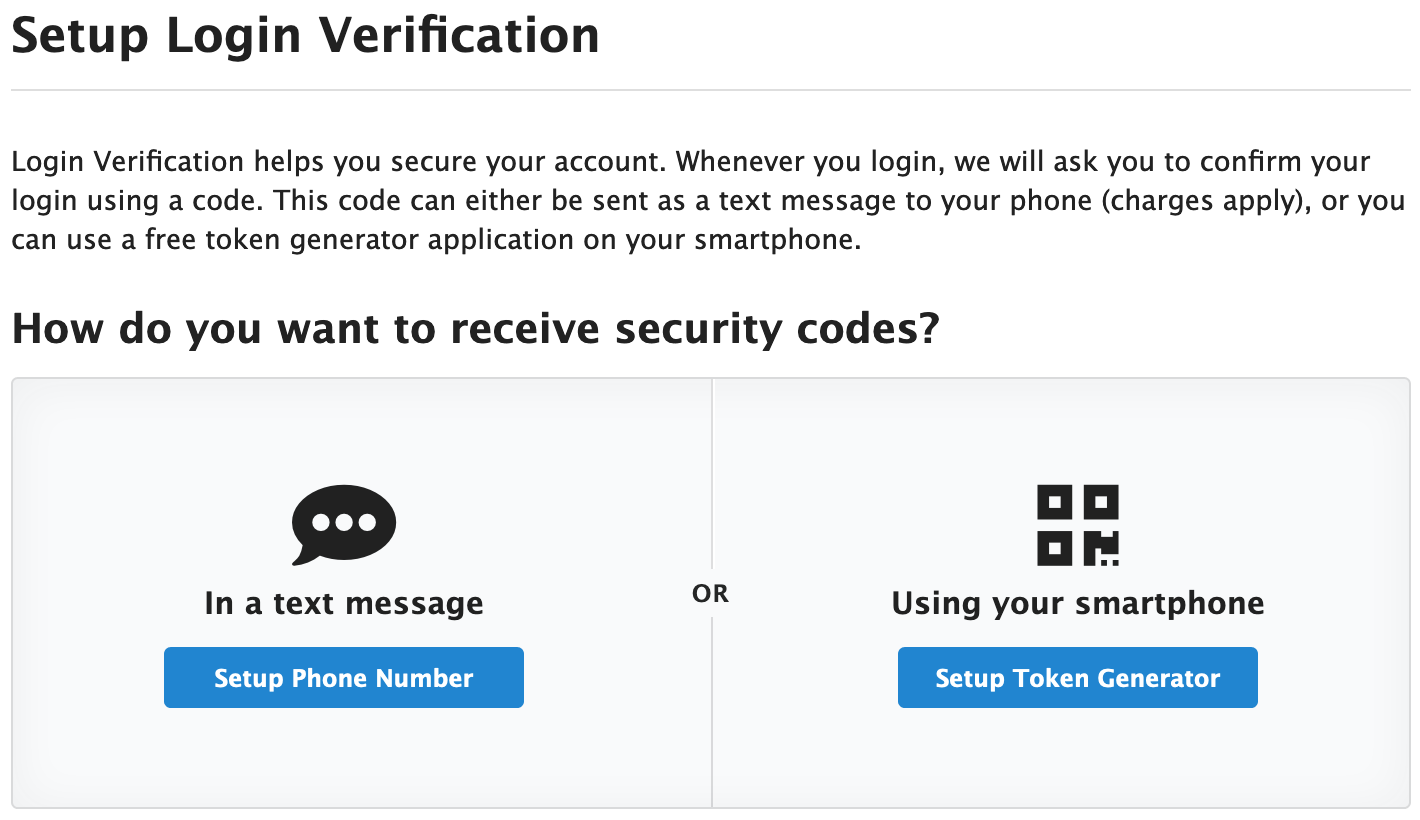
Click the Setup button to configure login verification. You can choose between using text messages or a token generating application: 
If you choose the text message option, you will have to provide a phone number: 
Once you click Next, a code will be texted to the specified phone number and entering it in the following screen will complete the setup. 
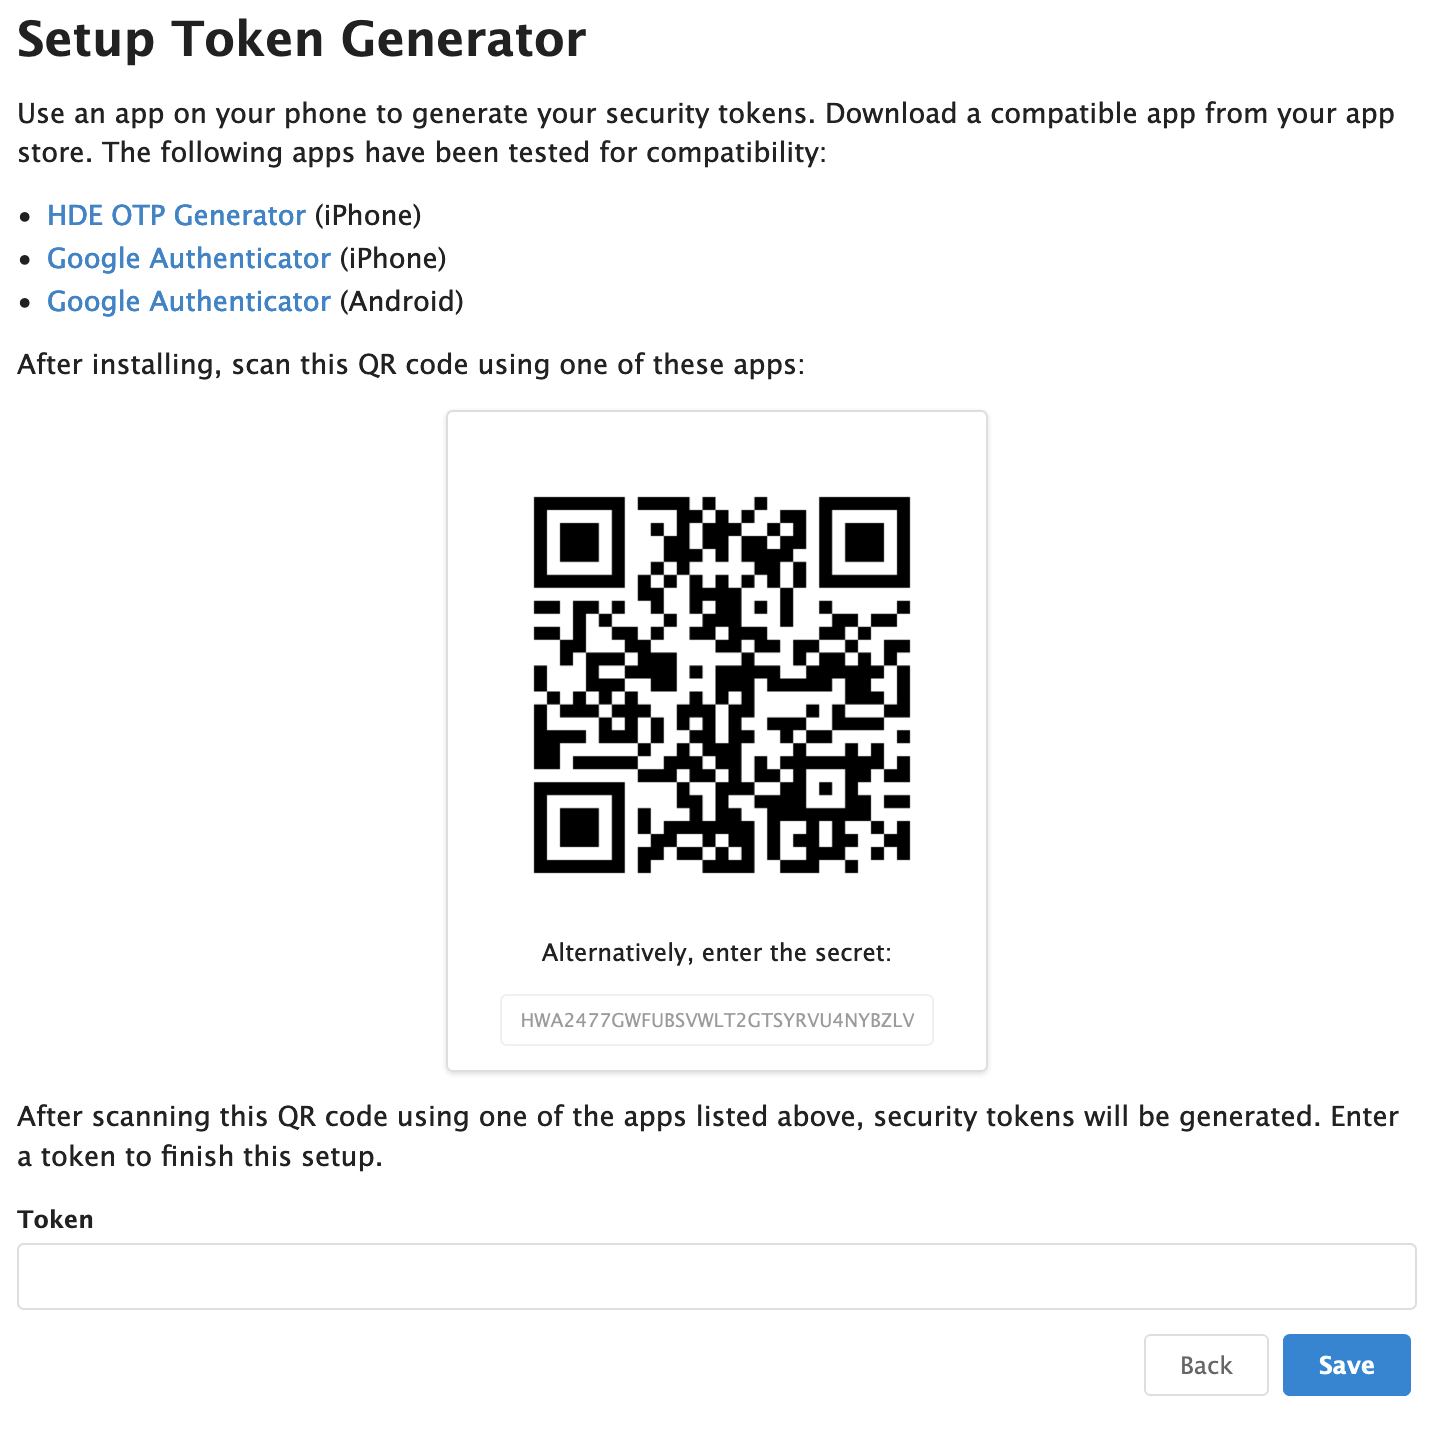
Alternatively, if you choose the token generating application, you will be shown the following screen: 
After scanning the QR code in your token generating application, it will provide you with a token. Entering the generated code and clicking Save will complete the setup.
Completing the setup will take you back to the Account Settings screen, where the login verification section will now look like this: 
The next time you login to CloudBilling you will be prompted for a code generated by your token generating application, or sent to you via text message. At this point you could tell the system that it should trust the device that you are currently on. This means that the system will not ask you to enter a code when logging in from this device.
Note: Device is in this context is your browser. So. if you use a different browser on the same machine, CloudBilling will ask you to enter a code.
You can disable login verification for your account in this screen at any time, by clicking the Disable button. It can then be re-enabled at any time by going through the steps described above. This is also the process you would follow to reconfigure your login verification, should you wish to switch from text messages to the token generating app for instance.
If you have trusted devices, the login verification section will reflect that. You can also revoke the trust in these devices by clicking the link. This will remove all devices from your trusted list, so you will have to provide a code again on your next login. 